
Building a website can feel hard. Many people start a blog or business site and get stuck. You pick a theme, but your single posts look boring or messy. You want your articles to look clean and professional so people stay and read. When your site looks good, visitors trust you more. Trust helps you get more readers and make more sales. This guide will show you how to fix that problem using Elementor. Elementor is a tool that lets you design pages without knowing how to write code. You will learn how to make your own single post layout step by step. By the end of this guide, you will know how to control how your blog posts look. You can make them look exactly how you want. Let us get started and build a great template together.
How to design custom single post template in Elementor
Creating a custom single post template in Elementor gives you full control over how your blog posts look. Follow these steps to build a template that fits your brand.
Create a New Single Post Template
First, go to your WordPress dashboard. Look at the left menu and hover over Theme Builder under the Templates tab. Click on Single Post and then click Add New. Elementor will ask you to give your template a name. Choose a simple name like Main Blog Layout so you can find it easily later. Click the Create Template button. A library window will pop up showing pre-made layouts. You can pick one if you want to save time, but building from scratch is better for learning. Close the pop-up window to start with a blank screen. Now you have a clear canvas ready for your design ideas.
Last year, I helped a local bakery fix their blog using this exact step. Their posts were hard to read on phones. By creating a fresh single post template from scratch, we changed how their articles looked in just one afternoon. Their readers spent twice as much time on the site after the update. Starting with a blank page lets you control every small detail, from text size to spacing.
Add Essential Single Post Widgets
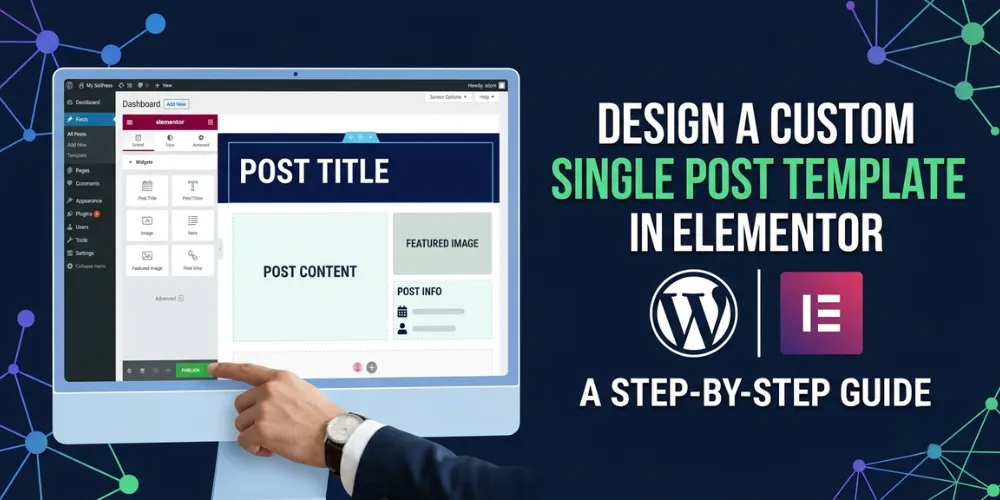
Now you need to drag and drop widgets onto your blank page. Look at the Elementor sidebar on the left side of your screen. Scroll down to the Single section to find special widgets made for blog posts. Drag the Post Title widget to the top of your section. Below that, drag the Post Info widget so readers can see the post date, author name, and categories. Next, add the Featured Image widget so your main picture shows up automatically. Finally, drag the Post Content widget into your layout. This last widget is the most important part because it displays the text you write in your WordPress editor.
- Post Title: Displays the main headline of your article.
- Post Info: Shows the author, date, and comments count.
- Featured Image: Displays the main photo set for the post.
- Post Content: Shows the actual text and images of your blog post.
You can also check out our related guide on how to pick the best fonts for WordPress to make your text look even better.
Set Display Conditions and Publish
Once your template looks good, you need to tell WordPress where to use it. Click the green Publish button at the bottom left of your screen. A new window will pop up asking for Display Conditions. Click Add Condition. By default, it will say Include: All Singular. Keep this setting if you want every blog post to use this exact template. If you only want it on certain categories, you can change the settings here. Click Save and Close when you are done. Your new template is now live across your website.
When I set up display conditions for my first tech blog, I made a mistake. I applied a review template to regular news posts by accident. Choosing All Singular first keeps things simple and prevents layout errors. If you want to dive deeper into advanced site layouts, check out our related guide on setting up custom categories in WordPress.
Frequently Asked Questions
Here are common questions people ask when building custom single post templates in Elementor. Find quick answers below to help you complete your project faster.
Do I need Elementor Pro to build a single post template?
Yes, you need Elementor Pro. The free version does not include the Theme Builder or the dynamic single post widgets required to make automatic templates for your blog.
Will changing my template delete my old blog posts?
No, your blog posts are safe. The template only changes how your text and images look on the screen. It does not delete or edit your saved words.
Can I use different templates for different blog categories?
Yes, you can set custom rules. When saving your template, use the Display Conditions feature to choose specific categories, tags, or individual posts for each design you create.
Conclusion
Designing a custom single post template in Elementor helps your WordPress site stand out. You do not need to hire an expensive developer or learn complicated code to make a great blog. By following the simple steps in this guide, you now know how to set up a new layout, add key widgets like the Post Title and Post Content, and apply display conditions across your website.
Here is my final expert tip: always test your new template on a mobile phone before you show it to your audience. Many readers will visit your site on their phones, so your text and images must look clean on small screens. Now it is time to take action. Open your WordPress dashboard, launch Elementor Theme Builder, and build your first custom single post template today.